Jump to content


Photo
- - - - -

Rendering not assembling correctly


  • Please log in to reply
9 replies to this topic

#1 Jeff Hamilton

Jeff Hamilton

    Advanced Member

  • Members
  • PipPipPip
  • 63 posts
  • LocationGeorgia

Posted 30 May 2015 - 12:16 PM

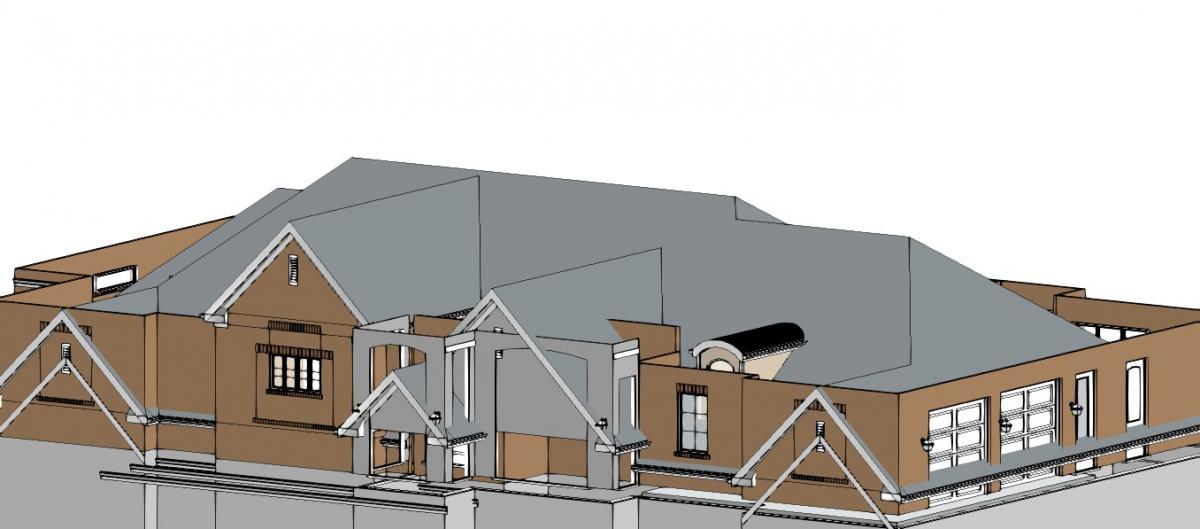
I have set of as-builts I am putting together for a job that has the house raised 78" above the detached garage (attached by a breezeway-just to the right on the picture). 


I have my garage set on a slab and creating a 3D view the garage sits on the auto-horizon.  I did the house walls and tried to offset them the 78" above.  I then put a floor system (joist, sub-floor, sill plate and rim joist) on the house.  I then created a foundation page and put in the crawl space walls.  However when I assemble the floors I am either getting the foundation wall on top of the first floor wall (which sits on the same plane as the garage) or it keeps forcing the first floor walls back down to the grade (or at 78" below where they are suppose to be.


I know either have an extra component in the floor system (I am guessing) that is not causing the foundation to line up correctly or maybe in my wall defs. 

Attached Thumbnails

  • DSC_0018.jpg


#2 Keith Almond

Keith Almond

    Advanced Member

  • Members
  • PipPipPip
  • 5,096 posts
  • LocationBrockville, Ontario, Canada

Posted 30 May 2015 - 01:02 PM

For now, set the auto horizon to 0" or turn it off. Never set the house to the auto horizon, ALWAYS set the horizon to the house.


Once the auto horizon is off, then assemble all your floors. The order they list in the model is the order they stack. regardless of when you add them. Right click them in the Navigation Pane, and you can move them up and down to suit.


Second Floor

First Floor

Basement/Foundation

Site Plan - if you have one.


That's the only reason I can see why the Foundation is above the First floor.


Get the model looking right without the site.


Then turn the auto horizon back on ..... actually in this case you would be better adding a site plan, property, and spot levels to actually design the grades as they are ..... but that may be another story for another day!


The auto horizon "tries" to set itself 4" below the First Floor Level - Go back into the options (press "Spacebar" in the 3D) and reset it back to 0" then. to make sure it sits at the bottom of the basement/foundation wall. Then adjust its height from there.


Keith

There are 10 types of people in this world ....... Those who understand binary, and those who don't.

Softplan user since version 5.5.2.5

www.homehardwarekingston.ca

#3 Jeff Hamilton

Jeff Hamilton

    Advanced Member

  • Members
  • PipPipPip
  • 63 posts
  • LocationGeorgia

Posted 30 May 2015 - 05:29 PM

Thanks Keith.  It seems to be triggered by one wall but I got the 3D the way I want it and that is what the outcome is. 


#4 randolph cohn

randolph cohn

    Advanced Member

  • Members
  • PipPipPip
  • 869 posts
  • Locationmarin county - california

Posted 30 May 2015 - 06:33 PM

have you put the top reference point (circle and cross hairs)

on each floor and in the exact same place on each floor.


tip:

i put it on the lowest floor and than do an


edit / copy to softplan clipboard 

and than

edit / paste to softplan clip board / hold position


to each floor above the lowest floor.


randy

v10 to future 2016+ ;)


#5 Jeff Hamilton

Jeff Hamilton

    Advanced Member

  • Members
  • PipPipPip
  • 63 posts
  • LocationGeorgia

Posted 30 May 2015 - 06:49 PM

Randy-that brings up a good question.  I added two reference points.  On on the house and another different one (triangle cross hairs) on the garage since they were on different planes.  The house has a crawlspace beneath it and the garage has a bonus room above it. 


And nice tip! that would keep that errant problem of missing the mark by a sheet of siding just to watch the house stack poorly. 


#6 Martin Livingston

Martin Livingston

    Advanced Member

  • Members
  • PipPipPip
  • 693 posts
  • LocationHalifax, Nova Scotia

Posted 15 June 2015 - 05:07 PM

I'm glad I read all these posts. I didn't even notice there was a "copy to Softplan clipboard" until Randy brought it up. That will come in handy!


Five out of four people are not very good with fractions

www.cresco.ca


#7 randolph cohn

randolph cohn

    Advanced Member

  • Members
  • PipPipPip
  • 869 posts
  • Locationmarin county - california

Posted 15 June 2015 - 08:17 PM

jeff,


i'm not following your use of the "TWO" different ref point.


i only use the TOP one (cross hairs and circle) for stacking the floors as we're instructed to do.

this crosshairs / circle is for stacking the floor "VERTICALLY" on top of each other and

lining up the ref circle with each other.


the use of any other ref pts don't do anything for stacking vertically.

i think they just line up drawings horizontally.

i personally never use them.


tip:

the way i put in the ref pt.

place cross hair ref pt on the lowest wall on the lowest plan in the stack (floor assembly)

than EDIT / copy to SP clipboard and paste to SP clipboard (HOLD position) them to  each of the floors in the stack


note: other ways of when to put in the ref pts which maybe someone will explain.


TIP;   best to have the lowest offset of each wall of each floor plan at 0.00"  and going UP from there.

there's probably some exceptions to this but offhand i'm not aware of it.

going by this rule has always worked for me.

there are some things you can offset down on a drawing but the bottoms of the walls/ top of ftgs are not one of them.

at least that's  how i've always drawn plans and it has kept me out of problems.


tip:  where you draw the offset of a wall in the softplan drawing has nothing to do with where it will be in relationship to a specific grade

in the final section.

when your offsetting a wall in a plan, your telling it where it'll be vertically in relationship to other walls

in the same drawing.   don't worry too much about other wall in the other floors plans,  do that when

you get to those plans.


if your confused,  don't worry,  your not alone.


randy

v10 to future 2016+ ;)


#8 Kris Blalock

Kris Blalock

    Newbie

  • Members
  • Pip
  • 6 posts
  • LocationFranklin, TN

Posted 11 February 2016 - 11:41 AM

I seem to be having this problem, but only on one of my drawings. I can't figure out why it continues to give me this...


#9 Kris Blalock

Kris Blalock

    Newbie

  • Members
  • Pip
  • 6 posts
  • LocationFranklin, TN

Posted 11 February 2016 - 11:44 AM

here is pic..floor stack issue.jpg

This used to stack and was fine, just recently went to work on it and now i can't figure out what is going on. Second floor seems to ignore the reference point all together.   I have tried assembling just first and second floors,  but it still is wanting to set both down on 0.


#10 Keith Almond

Keith Almond

    Advanced Member

  • Members
  • PipPipPip
  • 5,096 posts
  • LocationBrockville, Ontario, Canada

Posted 11 February 2016 - 12:03 PM

Have you created the roof as a Multi level roof, or do you have portions of the roof on different plans?


Check In your main floor plan - go to FILE > DRAWING OPTIONS > DRAWING OPTIONS > SITE OPTIONS and ensure that Building Position is unchecked. If it's checked it's telling SoftPlan to stack all the floor above at the same level as the ground/main floor, and offset as specified, rather than stacking.


Keith

There are 10 types of people in this world ....... Those who understand binary, and those who don't.

Softplan user since version 5.5.2.5

www.homehardwarekingston.ca


0 user(s) are reading this topic

0 members, 0 guests, 0 anonymous users