Jump to content


Photo

Open Rafter roof

open rafter trellis

  • Please log in to reply
14 replies to this topic

#1 Tom Rogers

Tom Rogers

    Advanced Member

  • Members
  • PipPipPip
  • 1,159 posts
  • LocationVilla Rica, Georgia

Posted 22 April 2016 - 10:40 AM

I am trying to do an open rafter truss.  Basically it would be a normal roof just without the shingles and sheathing.  However in my 3D when I try to click off one the whole roof (areas that I want roofed) disappear.   I also thought I could add Queen trusses separately and adjust the size to give the look of the rough cedar that I desire; however if I don't add a roof I cant get trusses to show.  


So I am wondering what other people are doing in a similar situation?  While I am planning on using Softlist on this project it would be helpful if not too out of the box, but I probably can work around it. 


"remember... what we are building today, should be what we want in the future"​
Version 10 to Version 2024+ and beyond
www.residentialproductions.com


#2 Yvon Gonthier

Yvon Gonthier

    Advanced Member

  • Members
  • PipPipPip
  • 1,288 posts
  • LocationOttawa

Posted 22 April 2016 - 12:52 PM

Don't know if this would solve completely but you would have to draw your roof in separate sections so that you have one type of shingle for the sections that you want to turn it off and another type for the section you want to keep on. The only thing is that you can't (or that I know)select two different types of roof sheathings so that would have to be on or off.

#3 Tom Rogers

Tom Rogers

    Advanced Member

  • Members
  • PipPipPip
  • 1,159 posts
  • LocationVilla Rica, Georgia

Posted 22 April 2016 - 01:00 PM

Thanks Yvon.  That I did do and I was able to turn it off,  And on the roof I can turn off the fascia and soffit.  It is that last piece of sheathing that I cant get rid of. 


"remember... what we are building today, should be what we want in the future"​
Version 10 to Version 2024+ and beyond
www.residentialproductions.com


#4 Mike Lloyd

Mike Lloyd

    Newbie

  • Members
  • Pip
  • 6 posts
  • LocationVista Ca

Posted 23 April 2016 - 10:50 PM

Something like this work?

Attached Thumbnails

  • exposed truss.jpg
  • exposed truss 2.jpg

  • Wouter van Tiel likes this

#5 Tom Rogers

Tom Rogers

    Advanced Member

  • Members
  • PipPipPip
  • 1,159 posts
  • LocationVilla Rica, Georgia

Posted 23 April 2016 - 10:53 PM

Yes.  Did you do it by building it with beams?


"remember... what we are building today, should be what we want in the future"​
Version 10 to Version 2024+ and beyond
www.residentialproductions.com


#6 Mike Lloyd

Mike Lloyd

    Newbie

  • Members
  • Pip
  • 6 posts
  • LocationVista Ca

Posted 24 April 2016 - 02:43 PM

You can do it with beams but I did this by creating a 3D symbol


#7 Tom Rogers

Tom Rogers

    Advanced Member

  • Members
  • PipPipPip
  • 1,159 posts
  • LocationVilla Rica, Georgia

Posted 24 April 2016 - 04:04 PM

Yes, I am not as versed in creating 3D symbols


"remember... what we are building today, should be what we want in the future"​
Version 10 to Version 2024+ and beyond
www.residentialproductions.com


#8 randolph cohn

randolph cohn

    Advanced Member

  • Members
  • PipPipPip
  • 869 posts
  • Locationmarin county - california

Posted 24 April 2016 - 04:08 PM

if you don't know the process of making a 3d model ot it as mike did.


you could also try making the curved part with a
 

beam / check slope / check / vertical curve put a deflection on it


make the sloped beam with a beam and check "slope" and edit as needed


and the horizontal beam - needs no explanation

but

you can put a PROFILE on the ends of the beams by using a stock / beam end

or creating your own custom "beam end" PROFILE.


you can either place each part as needed or

use that to create a 3d model for use on other projects


randy

v10 to future 2016+ ;)


#9 Tom Rogers

Tom Rogers

    Advanced Member

  • Members
  • PipPipPip
  • 1,159 posts
  • LocationVilla Rica, Georgia

Posted 24 April 2016 - 05:04 PM

That is how I did it Randy; using beams and slope.  I'm old school and think like I would build it.  Need to hire my kid to create 3D pieces :P


  • Sam Morgan likes this

"remember... what we are building today, should be what we want in the future"​
Version 10 to Version 2024+ and beyond
www.residentialproductions.com


#10 Keith Almond

Keith Almond

    Advanced Member

  • Members
  • PipPipPip
  • 5,098 posts
  • LocationBrockville, Ontario, Canada

Posted 25 April 2016 - 07:05 AM

If I can get my home computer to show the 3D previews - Don't know why they aren't working - I'll try and put together a little tutorial for you Tom. Once you get the hang of it, they are quite easy and reasonably quick to produce - Trusses are quite simple since they only have a simple thickness. That way you can model anything you want.


  • Tom Rogers likes this
Keith

There are 10 types of people in this world ....... Those who understand binary, and those who don't.

Softplan user since version 5.5.2.5

www.homehardwarekingston.ca

#11 Keith Almond

Keith Almond

    Advanced Member

  • Members
  • PipPipPip
  • 5,098 posts
  • LocationBrockville, Ontario, Canada

Posted 24 May 2016 - 10:52 AM

Okay, I'm back off vacation (yes, I know you thought I'd kept my mouth shut for a while!) ... Let's see if I can get this done whilst I eat my lunch ...


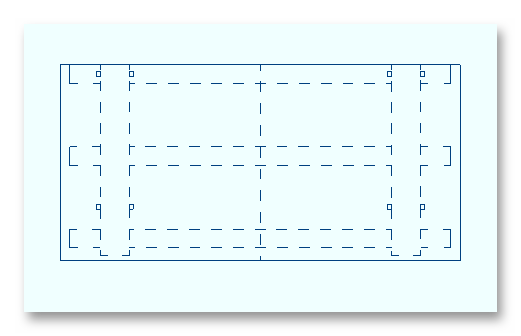
1. Draw out the required shape on a NEW plan with lines (and arcs if required).

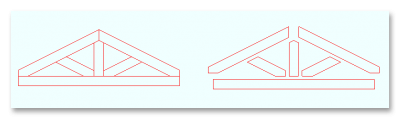
2. Trace over the individual shapes with 3D polygons (edge edit to create any required arc's) - I've also separated the shapes just so you can see they are full polygons - and edit them ALL to the required depth (and offsets if you have multiple depths).

2016.05.24_10h33m57s_001.png

3. Remove anything you have from the model, and just add the Feature Truss drawing (or whatever it is) to the model.

2016.05.24_10h41m41s_011.png

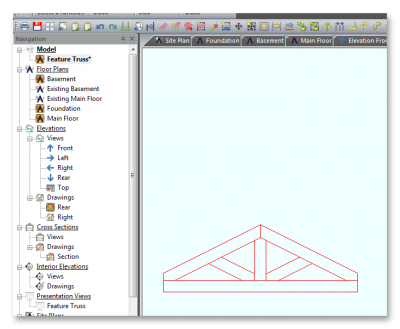
4. In the 3D model go to FILE > EXPORT > DWG and save the 3D model as a drawing file. (I normally save in a directory called KEITH within C:\SOFTPLAN\3D\3D SYMBOLS as I think it keeps them together better, but that's personal preference).

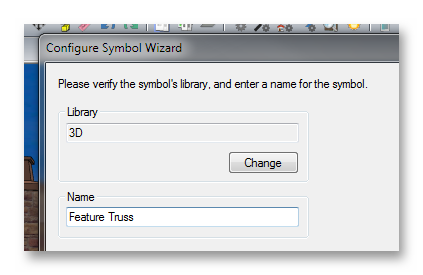
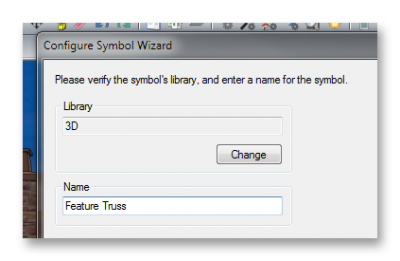
5. Go to FILE > SYSTEM OPTIONS > SYSTEM LIBRARY and whatever Library you want to save in, and click the "WIZARD" button.

6. Choose the library you want to save your 3D model in (again I always put my models in the "3D" library), and give it a name.

2016.05.24_10h36m14s_002.png

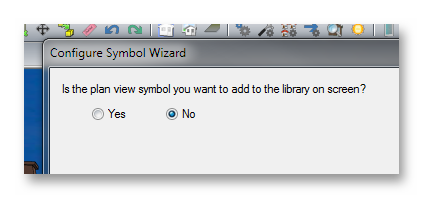
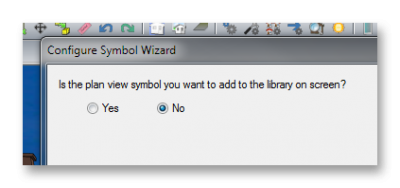
7. Is the plan view symbol on Screen? Typically it's not so click NO.

2016.05.24_10h36m33s_003.png

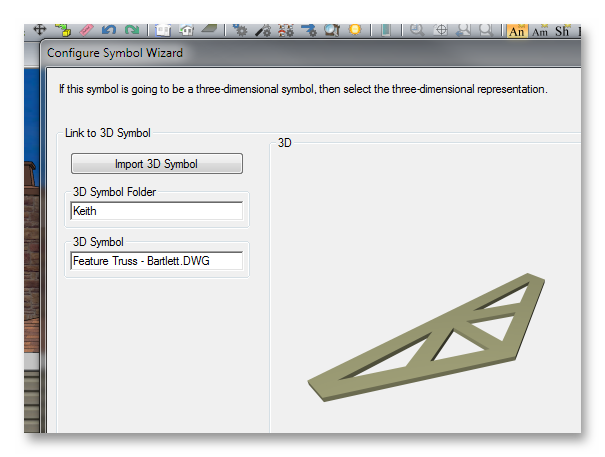
8. You'll then be asked to import your symbol - if you saved it in a none Softplan folder use IMPORT, otherwise just click on the folder and symbol boxes. At this point you should see a really nice representation of your 3D which you can grab and spin round. If you DO everything should work fine ... if you don't then you have done something wrong earlier, and may need to start again ... SORRY!

2016.05.24_10h37m13s_004.png

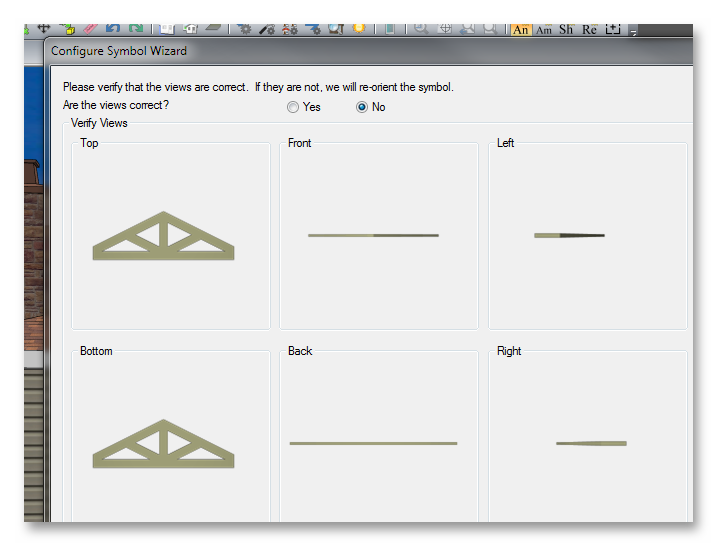
9. You'll then be asked to orient the symbol - Since you saved it in PLAN, the views are invariably NOT correct, so click no ...

2016.05.24_10h37m42s_005.png

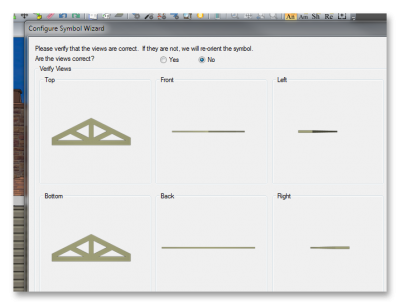
... and re-orient to suit.

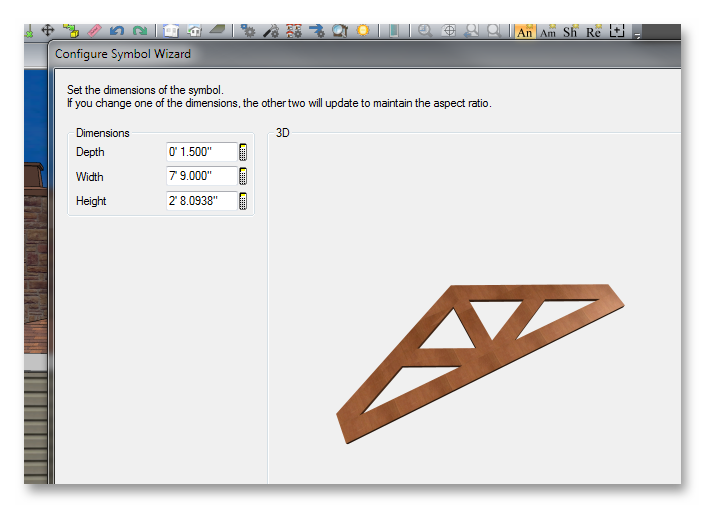
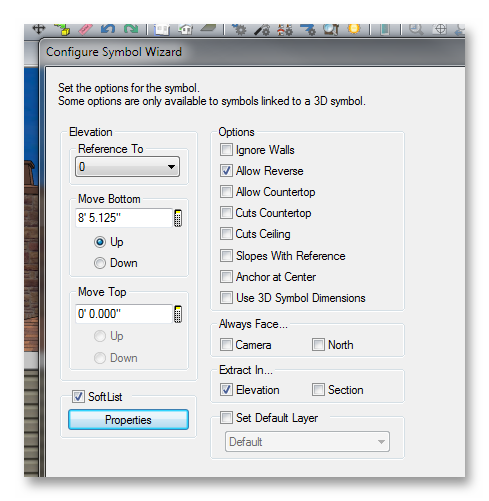
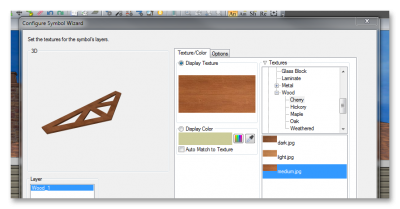
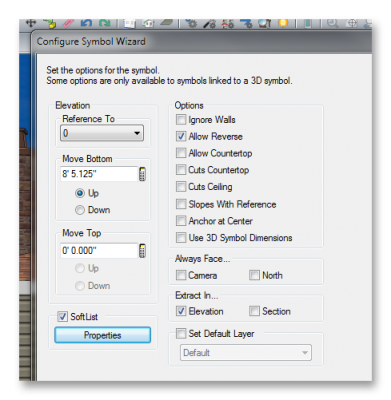
10. Once the orientation is correct, you can then select a finish ... (IMPORTANT: if you want the item to have multiple finishes, then all the SOLID polygons must be in multiple GROUPS when you create them).

2016.05.24_10h38m31s_006.png

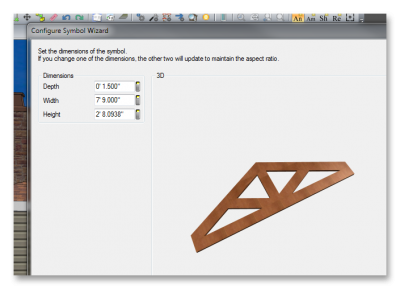
11. All the dimensions should be correct, but if not, they can be adjusted now.

2016.05.24_10h38m55s_007.png

12. Correct the offset as required - This can be left as 0 if you wish and the offset adjusted on plan to suit.

2016.05.24_10h39m24s_008.png

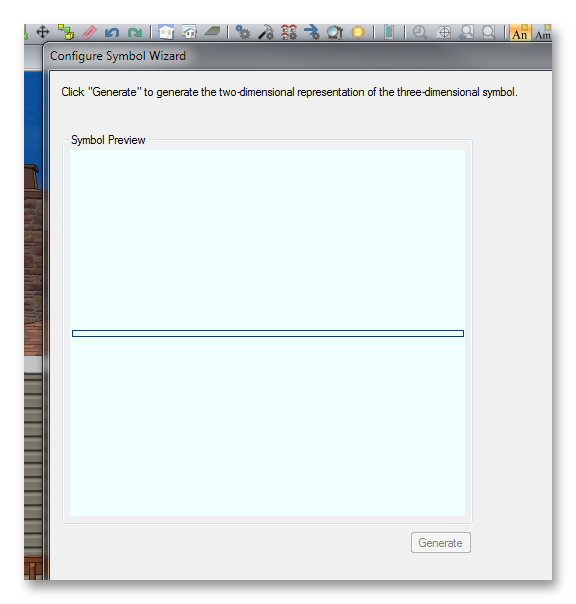
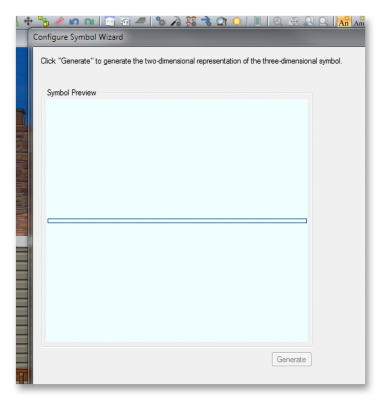
13. Click "GENERATE" to create a 2D plan symbol.
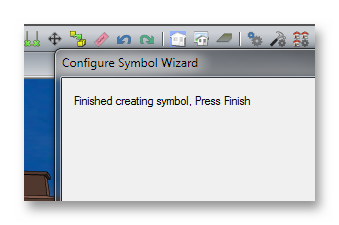
2016.05.24_10h39m53s_009.png

14. Click "FINISH"

2016.05.24_10h40m23s_010.png

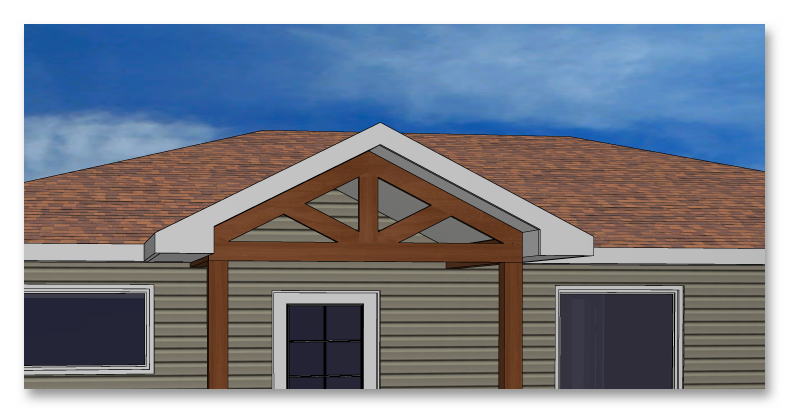
15. Position the created 2D symbol on plan - copy as necessary.

2016.05.24_10h43m13s_012.png

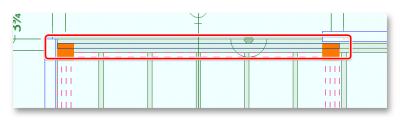
16. Recreate the model by removing the Feature Truss drawing and adding back the relevant plans, and view the new creations .....2016.05.24_10h43m42s_013.png


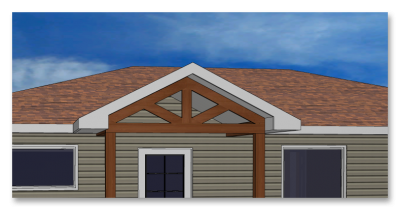
As usual, I may have missed something, if you have any questions, let me know.


  • Tom Rogers likes this
Keith

There are 10 types of people in this world ....... Those who understand binary, and those who don't.

Softplan user since version 5.5.2.5

www.homehardwarekingston.ca

#12 Yvon Gonthier

Yvon Gonthier

    Advanced Member

  • Members
  • PipPipPip
  • 1,288 posts
  • LocationOttawa

Posted 24 May 2016 - 11:20 AM

Welcome back Keith


#13 randolph cohn

randolph cohn

    Advanced Member

  • Members
  • PipPipPip
  • 869 posts
  • Locationmarin county - california

Posted 11 August 2016 - 06:35 PM

check HELP in softplan and type in


FORM SOLID POLYGON

and go to

forming a solid polygon from lines


also do a SEARCH in splash on the topic

"forming solid polygons"

or

"creating custom trusses"


if you can get to the old forum.

we have tons of great threads on

this subject.


randy

v10 to future 2016+ ;)


#14 Wouter van Tiel

Wouter van Tiel

    Member

  • Members
  • PipPip
  • 22 posts
  • LocationColorado

Posted 26 April 2017 - 11:02 AM

Thanks for the info, this will help. I do wonder though why every new user has to go through figuring this out. It would be so helpful if some basic trusses were included with the program.


#15 Keith Almond

Keith Almond

    Advanced Member

  • Members
  • PipPipPip
  • 5,098 posts
  • LocationBrockville, Ontario, Canada

Posted 26 April 2017 - 01:50 PM

Softplan gives us a lot of tools to be able to create whatever we need. Only if you need an object that curves in two planes are you really stuck.


I've posted this before, but a few new members may not have seen it ... this Canopy Roof symbol was created wholly in Softplan with the standard tools.


2017.04.26_15h49m00s_008.png


2017.04.26_15h48m42s_007.png


Keith

There are 10 types of people in this world ....... Those who understand binary, and those who don't.

Softplan user since version 5.5.2.5

www.homehardwarekingston.ca


1 user(s) are reading this topic

0 members, 1 guests, 0 anonymous users