Jump to content


Photo

4 rendering questions

symbols uneven walls

  • Please log in to reply
15 replies to this topic

#1 Dave Pazyniak

Dave Pazyniak

    Advanced Member

  • Members
  • PipPipPip
  • 402 posts

Posted 13 February 2017 - 08:21 AM

Good Morning All,


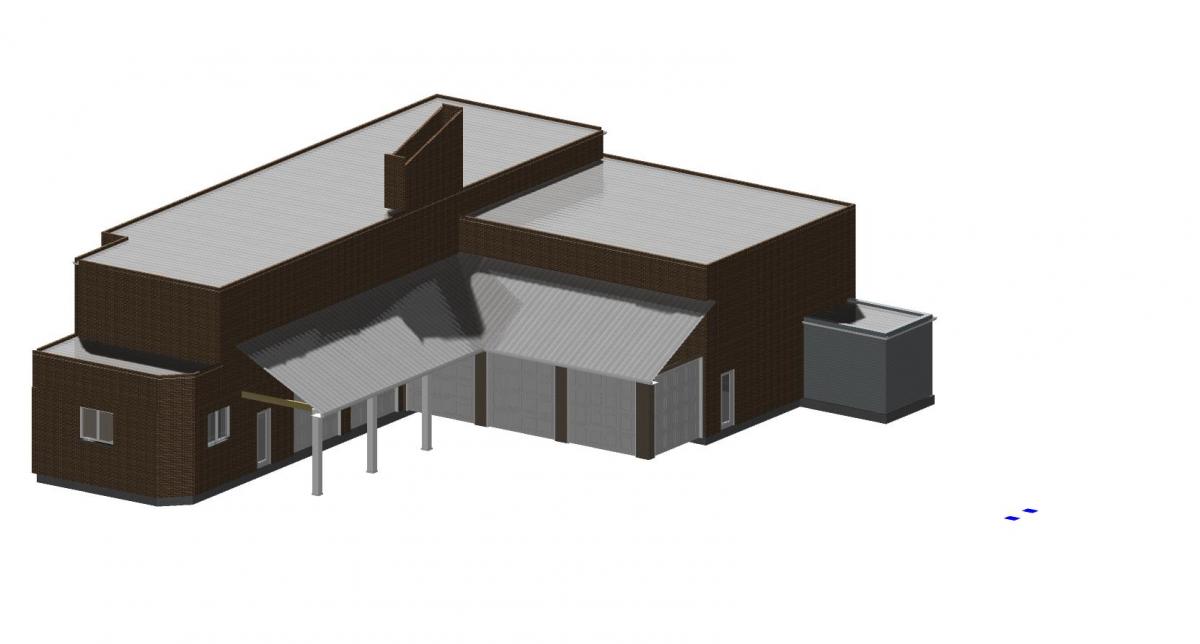
Working on a restaurant rendering (render 1 attached) and I am struggling with 4 simple(?) issues:


1. I have placed some outdoor patio furniture on the drawing, but it is not being rendered.  The item's "visible in all modes" is checked, and "symbols" is checked under my extraction options.  As far as I can tell, patio table-glass 4 seat has a 3d rendered view.


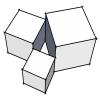
2. I have a short wall with a garage door and a shed roof over it.  When I check "fit to roof" and regenerate the drawing, it pushes up my second floor.  See render 2.


3. Can anyone give me tips on getting a roof over the angled wall small third story projection?


4. Is there a way to extend portions of the exterior walls above the roofline for signage?  Ideally in irregular shapes?


Thank you for any assistance!

Dave

Attached Thumbnails

  • render 1.jpg
  • render 2.jpg


#2 Tom Rogers

Tom Rogers

    Advanced Member

  • Members
  • PipPipPip
  • 1,159 posts
  • LocationVilla Rica, Georgia

Posted 13 February 2017 - 08:35 AM

I believe for 1. uncheck you cleanup in the symbol as it probably is not showing at 0" or 4" (if standard concrete floor).  It is probably snapping on stacked and showing at different height based on something you have in the way the building is put together.


For #2 again it has to deal with the heights and how the building is assembled in the model.  The wall is snapping to the sloped end point of the shed roof thus pushing floors up.  Try using the the gable end to be the wall material and change it to brick.


For #3 you should be able to put a roof on the tall section as a separate (trace roof).  It will probably snap the the second floor so you will have to adjust it manually


Sorry, cant assist in #4


"remember... what we are building today, should be what we want in the future"​
Version 10 to Version 2024+ and beyond
www.residentialproductions.com


#3 Guest_Derrik Bauer_*

Guest_Derrik Bauer_*
  • Guests

Posted 13 February 2017 - 08:59 AM

#1  Here are some possible solutions:

               Make sure the "Extract in Model" is checked within the "Edit Item" function.  

               If that still doesn't work, try turning it into a different symbol to make sure there isn't an issue with the symbol you are using.  

               Another possible cause would be building options, however if you can see it on the plan view you should see ti in 3D.  

               Is it possible that the plan you have it drawn on is not in the building stack?

               Is the offset way off?  Buried 110ft underground?

               Textures turned off?


#4:

Typically any wall section that need to extend above the ops of the 1st level should be drawn on the 2nd level and set to a negative offset.  Softplan will choose the highest wall or beam to set "0" for the next floor.  So if you extend a 1st floor wall up, it will raise the entire 2nd floor.   So, draw the wall on the 2nd floor and enter an appropriate negative offset. 


#4 Yvon Gonthier

Yvon Gonthier

    Advanced Member

  • Members
  • PipPipPip
  • 1,288 posts
  • LocationOttawa

Posted 13 February 2017 - 09:05 AM

Unfortunately, there is no easy way for #4. A few of us have asked about the possibility to set heights at different points. The only work around that I have found is that you need to have something like a roof or ceiling to extend to. You can draw for example a temporary ceiling(s) with the required shapes and do extend to ceiling of your wall (you may have to pull back your real ceiling so that it doesn't fit to that one) and un-check clean-up after. You can put that ceiling on a building option that you can turn off after or erase it but always good to have the option to turn it back on if required.


#5 Yvon Gonthier

Yvon Gonthier

    Advanced Member

  • Members
  • PipPipPip
  • 1,288 posts
  • LocationOttawa

Posted 13 February 2017 - 09:07 AM

#4:

Typically any wall section that need to extend above the ops of the 1st level should be drawn on the 2nd level and set to a negative offset.  Softplan will choose the highest wall or beam to set "0" for the next floor.  So if you extend a 1st floor wall up, it will raise the entire 2nd floor.   So, draw the wall on the 2nd floor and enter an appropriate negative offset. 

If you use the Circle Reference Point on each level, it will take care of that problem.


#6 Dave Pazyniak

Dave Pazyniak

    Advanced Member

  • Members
  • PipPipPip
  • 402 posts

Posted 13 February 2017 - 01:20 PM

Thank you all.  I am getting closer. 


My furniture issue seems to be that the furniture does not display in my elevation views, but only in the 3D views.  Is that the way it should be or do I have a setting wrong?


I have drawn my wall for under the shed roof, but when I extend to roof (or ceiling), it extends pas the roof.  see new render.


I can manually adjust the new wall heights, but is there a better way? 


Is there a way to draw a multi height wall, or do I need to create one by extending to a roof?


Thanks for your help and patience...


Dave


#7 Mark Petri

Mark Petri

    Advanced Member

  • Members
  • PipPipPip
  • 1,497 posts
  • LocationEvergreen, CO

Posted 13 February 2017 - 02:23 PM

In the symbol menu you need to be sure the "extract in elevation" is checked for the symbols you want to show in elevation.


You can draw any sort of shapes as solid polygons, cubes, cylinders, etc. within SP, and extract as a symbol with textures to match your walls for the walls you want projecting above roofs with odd shapes. When creating the symbol be sure to set orientations correctly.


Or, you can use SketchUp to create whatever model of the exterior wall projections you want and then add them as symbols in your SP drawing and set offsets how you want them. Be sure to give yourself options within SketchUp for the different textures you want to represent.


For floor offsets you can also draw walls way off (away) from your model and use the top reference point to connect those walls on each drawing level in your model. Draw it on your lowest level and set the height accordingly. Be sure to draw the wall in a place where it will not affect your site or anything that is cut by a wall. Then, copy and paste in each of the other drawings in the model and adjust the height appropriately for each level.


For the 3rd story roof, draw it on that level and only have that level showing in the roof window. Then it ought to only see and snap to walls on that level. You can draw roofs on every level in your model to keep them separate from each other if desired. The only reason to have them on a 2nd floor (while referencing a 1st floor for example) is if they need to reference walls and/or beams on both levels. Otherwise you can put roofs on the level they're needed on.


Mark Petri

Petri Building and Design


#8 Keith Almond

Keith Almond

    Advanced Member

  • Members
  • PipPipPip
  • 5,092 posts
  • LocationBrockville, Ontario, Canada

Posted 13 February 2017 - 02:56 PM

The only reason to have them on a 2nd floor (while referencing a 1st floor for example) is if they need to reference walls and/or beams on both levels. Otherwise you can put roofs on the level they're needed on.


Roofs are much better if they are ALL on the upper level. Most times it doesn't matter, but if you have hipped roofs from multiple levels intersecting, they will show correctly if they are on one plan, but if they are drawn on multiple plans, they (in my experience) don't intersect correctly.


Keith

There are 10 types of people in this world ....... Those who understand binary, and those who don't.

Softplan user since version 5.5.2.5

www.homehardwarekingston.ca

#9 Keith Almond

Keith Almond

    Advanced Member

  • Members
  • PipPipPip
  • 5,092 posts
  • LocationBrockville, Ontario, Canada

Posted 13 February 2017 - 03:00 PM

If I have specific items like chimneys etc, that are above the roof, I will draw them on a level above the roof. In your example the above roof signage etc, may be better drawn above the roof, and you can add small roofs as necessary to that level separately.


Keith

There are 10 types of people in this world ....... Those who understand binary, and those who don't.

Softplan user since version 5.5.2.5

www.homehardwarekingston.ca

#10 Dave Pazyniak

Dave Pazyniak

    Advanced Member

  • Members
  • PipPipPip
  • 402 posts

Posted 13 February 2017 - 03:20 PM

Thank you all!  One last quickie... Do I need a new wall style for each siding finish I want to display on the rendering?  For example, a 2x6 siding wall that I want to render in two different colors or siding patterns?  If I edit a wall in my rendering, it changes all of that wall type, not just the wall I am editing...


Thanks again, and have a nice evening!

Dave


#11 Keith Almond

Keith Almond

    Advanced Member

  • Members
  • PipPipPip
  • 5,092 posts
  • LocationBrockville, Ontario, Canada

Posted 13 February 2017 - 03:30 PM

Yes, you will need a new wall for each style that you want. You don't have to change that at system level though ... unless it's something you do regularly ... the easiest way (IMHO) is edit the wall > click definition > click SAVE AS and give it a new name > Then edit the siding material (which will reset all your custom settings - if any for that material) in the new wall, to another siding. Do that as many times as you like - There are 5 sidings (Siding A to Siding E), or you can use alternate materials. Generally a single material can only have a single finish.


  • Pamela Nacke likes this
Keith

There are 10 types of people in this world ....... Those who understand binary, and those who don't.

Softplan user since version 5.5.2.5

www.homehardwarekingston.ca

#12 D M

D M

    Advanced Member

  • Members
  • PipPipPip
  • 402 posts
  • Location..

Posted 13 February 2017 - 04:08 PM

4. Is there a way to extend portions of the exterior walls above the roofline for signage?  Ideally in irregular shapes?


You can try stacking solids above the wall, .. in this example, I used Wedges placed directly over the Exterior Wall.


(the 2X6 stucco is 7" wide by default, .. therefore, these wedges are 7" thick)


I used wedges because 'cubes' did not seem to want to align properly with the surface finish, .. (?)  .. the center square top solid is a wedge with equal 1st and 2nd heights.


Note that not all exterior finishes will weld together smoothly from stucco to surface of solids, .. depends on the texture .jpg you choose


.. invariably, someone will have a simpler solution.


#13 Dave Pazyniak

Dave Pazyniak

    Advanced Member

  • Members
  • PipPipPip
  • 402 posts

Posted 14 February 2017 - 02:41 PM

Thank you all for your help.  Here is how it ended up.  not perfect, but pretty good and I learned a lot, thanks to all of you!


Is there a trick to putting a roof on angled walls, like on the third story projection?


Thanks,

Dave

Attached Thumbnails

  • shake it.jpg


#14 D M

D M

    Advanced Member

  • Members
  • PipPipPip
  • 402 posts
  • Location..

Posted 14 February 2017 - 03:13 PM

Trace Roof around your Walls, .. whatever pitch you wish


Apply gables to the sloped sides, .. hip roof at the intended lower end, .. 'intersect' roof at the higher end, .. adjust overhangs as you wish, .. walls, .. rake top .. fit to roof


.. invariably, someone will have a simpler solution.


#15 randolph cohn

randolph cohn

    Advanced Member

  • Members
  • PipPipPip
  • 869 posts
  • Locationmarin county - california

Posted 15 February 2017 - 11:33 AM

if the "higher end" doesn't die into a wall,

you edit that roof edge to "gable"

similar to the side edges.


randy

v10 to future 2016+ ;)


#16 D M

D M

    Advanced Member

  • Members
  • PipPipPip
  • 402 posts
  • Location..

Posted 15 February 2017 - 01:15 PM

if the "higher end" doesn't die into a wall,

you edit that roof edge to "gable"

similar to the side edges.

That's right, .. I stand corrected, ..


The 'high' end as a gable allows you to extend your wall finish up to the soffit, ..


.. change the soffit at this gable to 'rake' to close it in.


.. invariably, someone will have a simpler solution.


Also tagged with one or more of these keywords: symbols, uneven walls

0 user(s) are reading this topic

0 members, 0 guests, 0 anonymous users