Custom Window Tutorial:
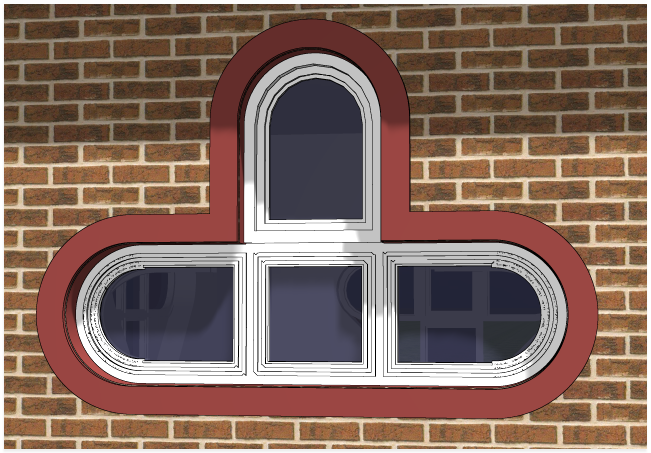
Large Custom Arch Top Window.
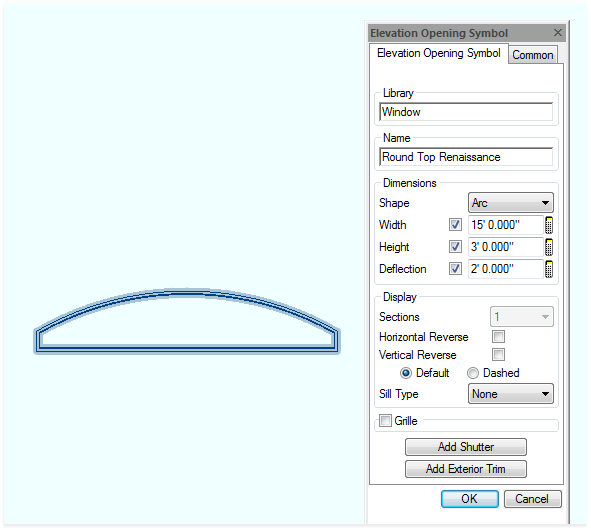
Go to DRAW > DETAIL > ELEVATION OPENINGS - WINDOW ROUND TOP RENAISSANCE and draw standard arc window
EXPLODE .... ONCE
Right Click - EDIT - Check SASH checkbox
EXPLODE AGAIN.
Divide centre of frame to centre of frame into however many segments you want ... In this case 5 - mirror the sash and bead about centre of the jamb.

and then copy 4 times from construction point to construction point.
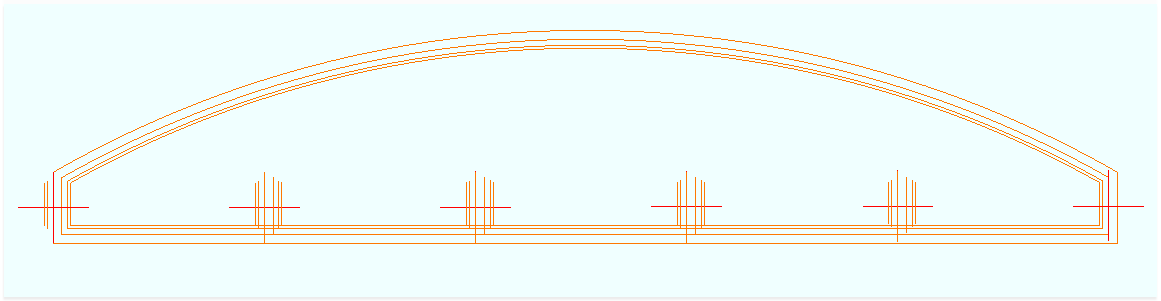
Extend all the lines and trim the arcs as necessary, until you have a finished window. Delete the construction points.
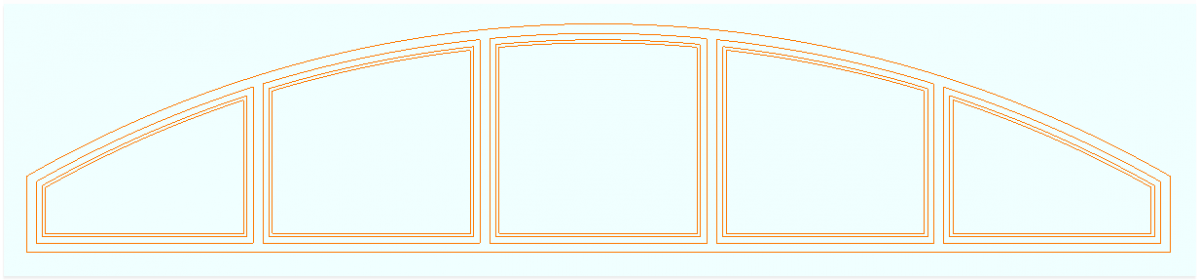
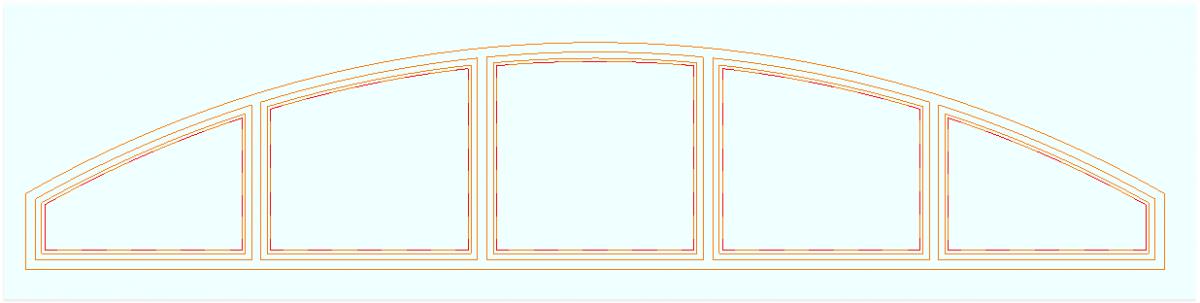
Now you must add glass.
Go to DRAW > SHAPE > POLYGON and set the linetype to medium dotted (I normally set the colour to red to so I can find it again).
With SNAP ON draw a polygon to each of corner of each bead.
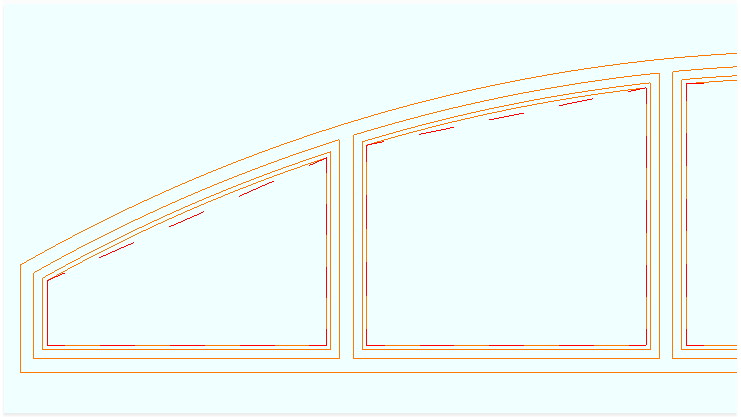
Edge edit the top of each polygon, and add a deflection - say 2", then edit one of the "bead" arc's on top of window and copy (CTRL-C) the radius. Then edit each polygon edge and paste (CTRL-V) the radius into the ARC RADIUS box. You should now have a glazing polygon that exactly matches the bead.
IMPORTANT: Now right click inside each polygon and explode. If you don't explode the polygons, you won't get glazing.
Now go to FILE > SYSTEM LIBRARY > CONFIGURE LIBRARY > ELEVATION OPENINGS ... Choose a suitable library - I always put custom windows in a "Custom| Library" Click ONE STEP and draw a box round your new window. Give it a name and click OK. You've now created your new window.
Without exiting the Configure library window, Change the Library Type to OPENINGS > Again, Choose a library, and give your window a name (I keep the same name as for the ELEVATION LIBRARY, as they are different libraries, you can duplicate your names - it makes finding it again easier).
Again, Click ONE STEP and name the window. Click CUSTOM OPENING Radio button, and select the library where you saved the elevation opening and the elevation opening itself.
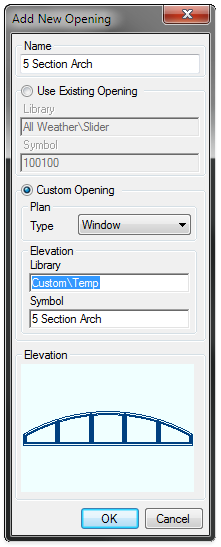
Click OK.
You can now configure the opening. Click EDIT INDIVIDUAL COMPONENT. In this case on the Component tab, change SECTIONS to 5, on the ELEVATION TAB change SILL to NONE (this can always be changed on the drawing).
CLICK OK - OK - OK.
You've now created a plan view of the custom elevation that you drew.
If all went well, you should now be able to add this window into a drawing ... (Please don't let me screw up ...)
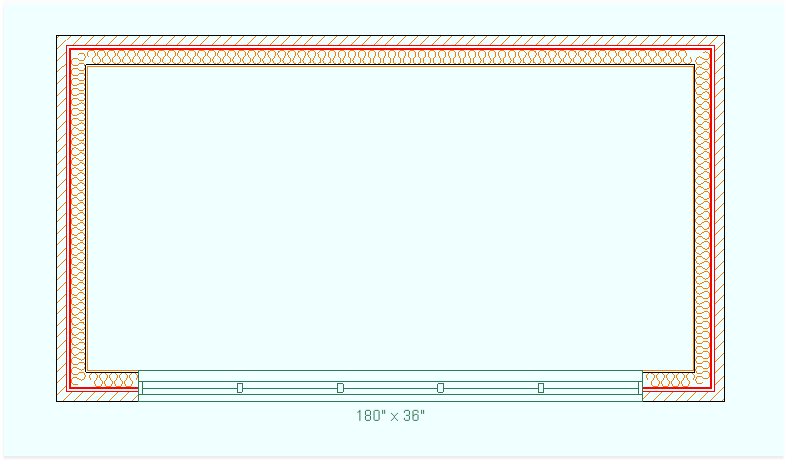
and VOILA ...... a PERFECT CUSTOM ARCHED WINDOW.

Phew ...
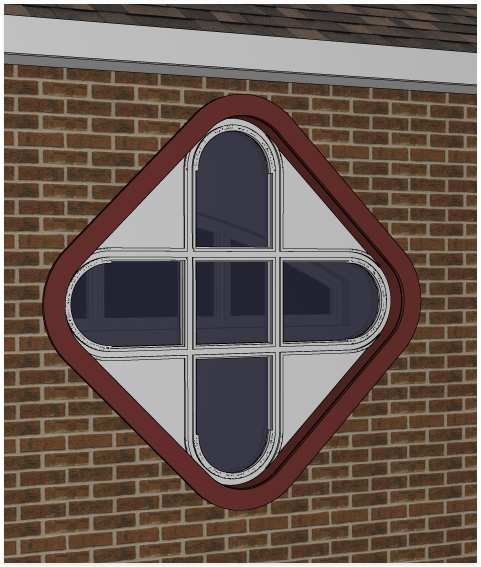
Obviously this was for a specific window, but EVERY window elevation that you can draw is created EXACTLY the same way. If you can follow this, you can create ANY window shape you like.
Now I have to admit, Softplan has some inherent faults when it comes to following complex windows, but the window design itself is valid ....